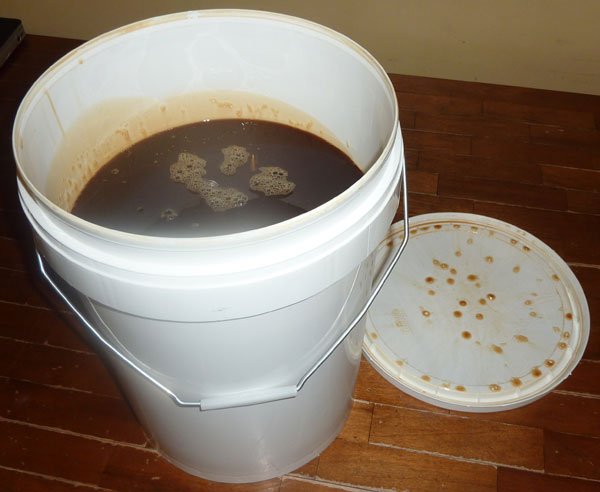
Working my way through a 28kg bucket of malt extract!

I found a local guy in Nelson that sells home brewing ingredients, Bill Fennell (website – ThatBeerPlace.com). I had a look through is his lists of supplies and the bulk malt extract caught my attention because it cost a fraction of what I usually pay for malt. The only snag was that it came in such large quantities, 28kg of malt extract is a lot of homebrewing! And liquid malt extract needs to be used up while it’s fresh so it’s not ideal to leave it hanging about for many months. Too much malt for me to handle in a short timeframe I thought.

Then some friends of mine decided to get into home brewing after tasting some of my beer. So I figured if we split a bucket between us it would be doable to use it up while it’s still fresh. Four batches each would see it all used up. So we ordered a bucket of Maltexo All Malt Light. I have 2 new batches in the fermentors now so I’m half way through my half. Here’s what I have brewing: Continue reading

Common Room ESB

This is based on a popular ESB recipe on the HomeBrewTalk forum called Common Room ESB which I tweaked it a bit and converted to extract.

brew notes and recipe »

Double Cascade APA

This a reprise of my first extract batch, the All Cascade APA, but with double the amount of cascade hops, 200g instead of 100g. It also features double dry hopping, 40g at ferment temp and another 40g at cold crash temp. I got that idea from reading about an Epic Pale Ale clone but I haven’t gone with quite as much hops as the Epic. Still it’s about double the hops that I typically add to a batch so it should be pretty intense.

brew notes and recipe »

Plum Wine

In addition to brewing beer I’ve also made a feijoa wine and distilled some spirits last April and now I’ve just started a batch of plum wine. I made a small batch of feijoa wine as we have a feijoa tree that produces lots of fruit. It turned out fairly good, a bit like a white wine with distinct feijoa flavour, but to be honest I would prefer a good Chardonnay, although I have to say it went particularly well with Thai food. We drunk it after about 3-4 months and now that I’ve done some more reading up on wine making, I’m thinking it would probably have benefited from significantly more aging. Maybe I’ll try some more this year when the feijoas are ripe. Also in April last year I distilled some spirits. I got the loan of a small air still from a friend and fermented up a batch of sugar wash and distilled it out. This resulted in a neutral spirit with which I made into gin, rum and feijoa liquor and I’m also currently making some limoncello with the last of the alcohol from that batch. The rum was simply made by adding Still Spirits rum essence. It was OK but tasted a bit artificial to me. The gin was made by infusion of juniper berries and various other spices and was really good, better than standard commercial gin in my opinion. The feijoa liquor was really good too and I’m looking forward to seeing how the limoncello turns out.

Now on to the Plum wine. Our plum tree was loaded with plums this year and after asking myself what am I going to do with all these plums the obvious answer came quickly. After looking at some plum wine recipes online this is what I came up with: Continue reading

Time for a Toucan

A toucan brew is simply one done with 2 cans of pre-hopped extract. The Coopers Stout that I brewed last year tasted nice but I felt it lacked head and body. It was a bit on the light side and I reckoned it could benefit from more concentration. So it seemed an ideal candidate for a toucan. I did the toucan with a can of Coopers Stout and a can of Coopers Dark Ale and 500g of brown sugar as it seems like a popular toucan recipe on the AussieHomeBrewer.com forum, and it’s very simple – no steeping grains, no boiling hops. I was a wee bit concerned about the amount of bitterness which I calculated to be around 70 IBUs using the Kit & Extract Beer Designer, but was reassured on the forum that it doesn’t taste overly bitter especially when aged for awhile.

A Cunning Plan To Prevent A Messy Blow-over Continue reading

Getting All Fancy!

For some reason or other I’ve resisted putting labels on my home-brew beer bottles until now as frankly I thought it was just getting a bit silly. Instead I just marked each bottle with the batch number written on a piece of masking tape so that I could tell what’s in each bottle. But after 7 or 8 batches I started forgetting which beer matched each batch number, so finally I’ve come to see the usefulness of properly labeling the bottles. Last night I bottled batch no. 11, my second go at Slutty Red, and I added some fancy labels, well not overly fancy (and just black and white because my printer is out of colour cartridge), didn’t let myself get too carried away! Continue reading

Toucan Stout

brew notes and recipe »

Slutty Red Version 2 (partial mash)

I had intended to make a 23L batch but discovered I only had .9kg of DME on hand, so I adjusted the recipe to a 17L batch with the majority of fermentables coming from grain.

brew notes and recipe »

Time to ramp up production!

I slacked off on the brewing during the winter, it seemed like I had an endless supply built up, but that ‘endless supply’ dwindled and was gone and I was spurred back into brewing action in October, brewing Batch #8. Then I brewed up Batch #9 last weekend, my first partial mash. But the thirsty days of summer are upon us already and so I had to do something about the pace of production. So time came to recommission my old extra fermenter, which I picked up earlier in the year to brew a sugar wash for distilling and a feijoa wine. And now for the first time I’ve got 2 fermenters going at the same time. Here’s what I’ve got brewing: Continue reading

Light Summer Ale

This is a quick and easy recipe for an easy drinking summer ale that I cobbled together with some ingredients that I had on hand. It’s an easy way to turn a Coopers Lager kit into a decent pale ale.

brew notes and recipe »

My Partial Mash Brewing Process

The next step in home brewing that I’m going to take is to do a partial mash. I’ve discovered a partial mash is actually quite similar to doing an extract brew with steeping grains. It just involves more grains soaked for longer time with a bit more attention to temperature and ratio of water to grain. And I don’t need any additional equipment, so really it doesn’t seem like a major step to make, but I’m writing up the process anyway in order to highlight the differences. Since it’s quite similar to extract brewing and I’m using the same equipment I’ll use my extract brewing process as a basis for this. Continue reading

A review of my first 7 brews

I’ve documented the process of making my beers here but haven’t yet reported on how they all turned out so it’s high time for a bit of a review.

Batch 1 – Kit Brew – Mangrove Jacks Munich Lager

A special one because it was my first, but actually I think it was one of the best, if not the best, of the 4 kit brews that I’ve done. As with most kit lagers this is a ‘pseudo-lager’ as it’s brewed with an ale yeast, so, although not true to style, it is still a good beer and got very good reviews from friends who tasted it. Being a kit brew it is lightly hopped but none-the-less very tasty.

see also: process writeup, tasting writeup

Batch 2 – Kit Brew – Blackrock East India Pale Ale

This kit would disappoint anyone looking for an IPA because it is most definitely not an IPA in style. It is more like a lightly hopped kit pseudo-lager than an IPA. I brewed it with beer enhancer and made it up to 18 litres instead of the usual 23 litres to make it more concentrated. I would describe it as more malty than hoppy and none of the bitterness you would expect from an IPA. That said, it still was a good tasty beer, just a bit daft that they call it an IPA.

see also: brew night writeup, mishap writeup

Batch 3 – Extract Brew with Speciality Grains – All Cascade APA

My first attempt at extract brewing was a real winner. It tasted like a good beer that you would get from a micro-brewery. I think this might just be my favorite one to-date.

see also: recipe writeup, brew night writeup

Continue reading

Batch No. 8 – Cascade & Amarillo American Pale Ale

Despite being over 6 months since I brewed an extract batch, brew night went more smoothly and efficiently than any of the previous extract brews that I’ve done (I must be getting the hang of this home brewing thing!).

This time I used the blender to grind up my steeping grain (Crystal 60) – not totally ideal as it gives an uneven grind (pulverises some of the grains and leaves others almost untouched), but I reckon good enough for steeping grains and a lot faster than pounding with a pestle.

The other interesting thing this time is that I uesd yeast that I harvested 6 months ago. It’s stretching it a bit in terms of how long yeast stored in the fridge is good for. I prepared a starter Friday night with the intention of brewing Saturday night but come Saturday there was no signs of any action out of the yeast. Continue reading

No The Homebrew Didn’t Kill Me!

It’s been a while since I posted here and a logical thinker may surmise that I might have succumbed to the effects of drinking my home brew. I’m happy to report that is not the case. I’ve had a bit of a break from the homebrewing over the winter. But now I’m just about to get stuck in to a new batch, batch #8. In case you’re wondering, batch #7 was a Cooper’s European Lager which turned out nicely.

Tonight I’m going to brew my favorite style, American Pale Ale. But I still haven’t quite decided what hops I’m going to go with. I have some Simcoe, Cascade and Amarillo in the freezer, so might go with either an all Simcoe or a Cascade + Amarillo combo. I have to get stuck in to the Kit And Extract Beer Designer spreadsheet now and figure out my hops additions.

I have some harvested yeast that I’ve revived and are rearing to go to work. They were sitting in the fridge for the last 6 months, so they were a bit slow to get going in my starter that I made 2 nights ago and I was about to give up on them yestrerday but found them in action today so they should be good to go.

Well I better get down to it and do some multitasking home brewing while watching the Rugby World Cup semi-final between the All Blacks and the Wallabies.

Batch No. 6 – Aidan’s Slutty Red

Aidan's Slutty Red

Roll over Mac's Sassy Red, here comes Aidan's Slutty Red

One of my favorite commercial beers here in New Zealand is Mac’s Sassy Red so I decided to have a go at making something similar. I found a recipe for an approximation called ‘Slutty Red‘ and I converted it for extract brewing and made a few mods based on ingredients available and getting some good advice on the home brewing forums.

The main hops flavour in Sassy Red comes from Motueka hops. These used to be known as ‘B Saaz’ hops (as they were bred by crossing Saaz with New Zealand breeding selection), and hence the name ‘Sassy Red’ for a Saazy beer.

One new experimental thing I did in this batch was using a pre-hopped kit as part of the fermentables. Why? Cost – the unhopped malt extract in either dry or liquid format costs significantly more than a corresponding amount of pre-hopped kit. I reckon it’s a supply and demand thing – more people are buying the kits than malt extract. So I used a can of Coopers Lager as it is one of the lighter ones available. Since it is already hopped I factored this into my bitterness calculations using the handy Kit & Extract Beer Designer. With most of the bittering coming from the Coopers can, I went with a 30 min boil instead of the usual 60 min as I was primarily just doing flavour & aroma hop additions after steeping the specialty grains.

So here’s the recipe and beer profile: Continue reading

Batch No. 5 – Nelson Amber Ale

I’m calling this one ‘Nelson Amber Ale‘ because it features Nelson Sauvin hops and I’m brewing it in Nelson. I used the handy Kit & Extract Beer Designer spreadsheet to work out the recipe quantities. It’s basically in the style of an American Pale Ale or an American Amber Ale, but more towards amber than pale since I used all amber malt plus a little medium crystal steeped grains. I used US-05 yeast harvested from batch no. 3. Fermentation started very quickly, within a few hours, and is still amazingly active – it’s been bubbling like crazy for 3 days.

Here’s the recipe: Continue reading

Updated Extract Brewing Process

The second extract batch went smoother and quicker than my first one and the brewing process was much more relaxed and enjoyable. The biggest improvement in the process was changing my sanitiser from sodium metabisulphite to iodophor. The sodium metabisulphite requires 1 hour of air drying to work, iodophor just requires 1-2 minutes of contact time, so it’s a hell of a lot more convenient to work with as you can sanitise on the fly instead of having to carefully plan your sanitisation in advance.

A significant difference in the process this time was the yeast preparation. Last time I rehydrated dried yeast, this time I had some yeast harvested from the last batch so I had to make a starter for it the day before. By the way, I found some helpful videos on a website called billybrew.com for how to harvest yeast and how to make a yeast starter.

So here’s the new improved process:
Continue reading

Thar She Blows!

The Coopers Stout kicks out one hell of a big foamy krausen:

To deal with this mess, I pulled out the airlock cleaned and sanitised it, cleaned off the mess off the lid and stuck the airlock back in. It’s still foaming out of the airlock a little bit but under control.
Continue reading

Third Batch Fermenting – first foray into hops and grains

This one is going to be interesting, I’ve got my fingers crossed and hoping for the best. That’s because when I tasted the wort, it was a bit, well, scary. I totally realise this may not mean anything but the wort from my previous two batches actually tasted good but this time I tossed out my OG samples after a little taste. But the first two batches were pre-hopped kits so it might not be a good comparison. This time the wort was very bitter and had a very concentrated hops taste. So I’m hoping this is normal and that the fermentation process will turn it into a nice tasty American Pale Ale. Otherwise I’ll probably be more inclined to stick with the pre-hopped kits, they are a lot less work and I have already got great results – my first batch is a very nice drop and it hasn’t even fully aged yet. Continue reading

Extract Brewing Process

To make sure that I don’t miss anything important for my first extract batch and end up running around like a chicken with it’s head chopped off, I have written up my process in advance. This process is my version of the extract brewing process based on best practices that I gathered from various sources and tailored to suit the ingredients and equipment that I have available. Continue reading