
My third variation on the Slutty Red recipe. I dry hopped with Nelson Sauvin instead of Motueka this time.
Dec 27 2012
Brown Porter
Dec 09 2012
A bad batch, a good batch and a change of plan
My Amarillo Ale is not tasting good so far, it has a harsh astringent taste, not really drinkable, at least at the moment. I did get a bit of this type of taste from the Hope Ale that I brewed previously, but with a bit of time that taste disappeared and beer became quite good (actually managed to get a bronze award in a local homebrew competition). In this case though it is much more severe, but still I’m not dumping it yet, I’ll give it a chance to see if time will heal it. I had one of the more experienced local homebrewers who is also a beer judge try a sample and she thinks it may be an infection. She also detected something in the Hope Ale so we came to the conclusion that my harvested yeast may have been to blame. The yeast I pitched in the Amarillo Ale was harvested from the Hope Ale. So, for the moment, I’m giving up on the yeast harvesting and sticking with new packets of yeast for each batch.
On a more positive note, I have high hopes for the batch that I bottled last night, a dark IPA that I call Shot In the Dark. It tasted quite amazing at bottling time, roasty, malty and hoppy all at the same time. The dark malts hide the hops a bit because there was a hell of a lot of hops in it but it didn’t taste super hoppy to me, just hoppy. I’m looking forward to trying it again in 3 weeks time.
I’ve been busier than usual with the beer production. After bottling last night, tonight I brewed up another batch. I had a porter planned, recipe and ingredients all ready to go. But at the last minute I decided I had a more urgent need to knock out another Skinny Blonde. Summer is upon us and this is just such a great thirst quenching summer beer, the porter can wait.
Dec 09 2012
Skinny Blonde II
I was all set to brew a porter but after downing one of the last few bottles of the original Skinny Blonde I figured I need to make some more of this easy drinking, fast disappearing, beer for the summer. As I liked it so much the way it was, I decided not to change much. The only changes are base malt is Golden Promise instead of Marris Otter and Pilsner malts, DME instead of LME, add a little bit of Carapils, and skip the dry hop addition but put the extra hops in the flameout addition instead. I’ve stuck with the single hops variety, Motueka, which tastes very nice in this.
Dec 09 2012
Shot In The Dark
With this recipe I’m shooting for some roasty flavours from the chocolate malt combined with the hoppiness of an IPA. The style is sometimes known as Black IPA but that’s a bit of an oxymoron and it’s got bugger all to do with India so I prefer to simply call it a Dark Hoppy Ale (DHA if you prefer acronyms).
In researching this beer I found that there are 2 different schools of thought to making a Black IPA:
- use a dark grain such as dehusked carafa to turn an IPA black (in essence primarilly for the colouring effect)
- use more roasty dark grains such as chocolate malt whose flavors come though in the final beer
The former approach seems to be more popular as you can get it to taste more like a traditional IPA but I was more drawn to the latter approach as I don’t see much point in making it black in colur only. I was interested in how the hops flavours would combine with the roasty malt flavours. This is my first attempt at a beer like this and I’m not following any tried and tested recipe, hence the name Shot In The Dark.
NOTE: The recipe below is for a half batch (12L)
Nov 16 2012
Amarillo Ale
On this recipe I went for a very small amount of bittering hops (only 5g at 60 mins and 5g at 30 mins), with fairly high amounts of late hops contributing more IBUs. My goal was a hops dominent beer with low levels of bitterness.
Aug 23 2012
Freedom Of Information Act Invoked For Obama’s Beer Recipe
 Did you know that they brew their own beer at the White House? The beers include White House Honey Ale, White House Honey Porter and White House Honey Blonde Ale. All three use honey from Michelle Obama’s White House garden.
A home brewer has formally requested recipes for the beers made by White House staff under the Freedom Of Information Act. Here’s a copy of the request: Continue reading
Aug 13 2012
First All Grain
I just finished my first attempt at an all-grain brew tonight. The process was similar to my partial mash process except no malt extract was used. Due to the restrictions of brewing on top of my stove and available pots, I went for a smaller batch volume of 13 litres. I think it all went fine but the proof will be in the drinking. It will be very interesting to compare this with my previous partial mash batch which was a similarly hopped pale ale.
I mashed 3kg of grain, which I crushed in my converted pasta maker grain mill, in a bag in my 20L pot with 9 litres of water. I was shooting for a mash temp of 68C but the temp had actually crept up into the low 70s by the end of the mash due to me leaving the inner ring on at the lowest setting. Next time I’ll leave it off and see how well the pot holds the temp wrapped in a towel and ski jacket.
I batch sparged in my 12L pot with 7 litres of water poured over the top of the grain in the bag. Then I mixed the runnings in the 20L pot and got about 14 litres. I split these between 2 pots for the boil. My SG was 1.049, giving me a brewhouse efficiency of around 73% which I believe is quite decent for this type of mashing process.
I had a little bit of trouble getting a good rolling boil in my 20L pot as the bottom of the pot has a concave center which I think makes it much less efficient on the ceramic electric stovetop. Later on in the boil, when the volumes had reduced, I ended up ditching it altogether and putting the extra wort into another 5L pot.
I cooled in ice water. It took 30 minutes to get it down to 16.5C, so I overshot a bit (22C would have been fine) and didn’t actually need to spend quite as long cooling.
I ended up with about 11L in the fermentor after evaporation loss so I topped it up with cold water to my 13L target. After giving it a good shaking to aerate, I pitched the US05 yeast that I had harvested from the previous batch.
Fermentation got off to a quick start – the airlock was bubbling and krausen had formed as soon as I checked it in the morning.
See the recipe and specs here.
Jun 16 2012
Plum Wine Bottled
I’ve just bottled the plum wine that I started making back in January. If you think the waiting in beer making is bad, try making wine! Five months until it’s even bottled, then a minimum recommended aging of at least six months. But as I do when bottling beer, I took the opportunity at bottling time to sample the product. And, well, I’ve got to say I’m pretty impressed at this point. Ok, it’s not the smoothest, finest wine but it’s more than drinkable in it’s current state. And if aging brings significant improvements, it’s going to be bloody good. The problem though is that it’s so drinkable right now that I reckon a lot of it’s going to be gone before the recommended aging period. Continue reading
May 24 2012
Skinny Blonde
This is my attempt at a lower alcohol (3 – 3.5%) blonde ale. I mashed at a higher temp to get more unfermentable sugars.
May 22 2012
Homebrew Competition
I entered my first homebrew competition on Sunday 20th May. The event, organisesd by SOBA Nelson and held at the Sprig & Fern in Nelson, was relaxed and informal. There were 30 different beers, entered by around 15 home brewers. The beers were judged by the entrants so we each had a chance to try 30 different beers. The overall standard was very good, there were a lot of top notch beers. My personal favorites (apart from my own of course) were Jason Bathgate’s Manuka Black Cofee Porter, Stink Hammer IPA, Smoked Moose Knuckle Brown Ale and Adam Tristram’s American Pale Ale. I was actually more impressed with the standard of beer at this event than what was on offer from the pros at this year’s Marchfest. Also it was a great chance to meet and socialise with other local home brewers.
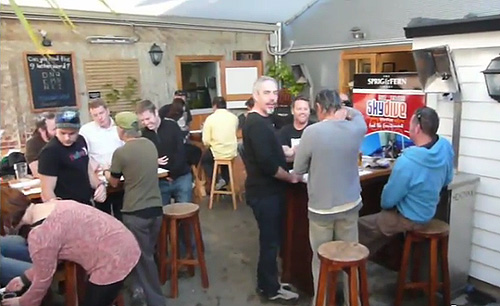 (Still from Matt’s video)
My beers didn’t place but they seem to have been quite well recieved by most people. I entered two recent batches, batch 13, Double Cascade Pale Ale and batch 15, Digital(ish) IPA. I actually thought the heavily hopped IPA had the best chance of placing but it was the milder Pale Ale that got the more favourible reviews.
The results of the competition are posted here. My entries were nos. 3 and 4. Here’s are the scores and comments I got (as best I could make out from the scrawl on the judging sheets): Continue reading
Apr 23 2012
The pasta maker grain mill
Proper grain mills can be expensive, especially here in New Zealand so when I found out that some home brewers were having success with converting cheap pasta makers into grain mills it seemed like something worth trying and I picked up one on TradeMe for $22. The rollers on a pasta maker are smooth and won’t pull in the grains so the first task is to roughen up the rollers. Reading through online forum discussions on this topic I learned that some people have disassembled the pasta maker, removed the rollers and got them knurled. But I also read about a much quicker and easier approach that also seems to work well and this is what I did. No need to disassemble, simply run a drill back and forth across the rollers and the drill bit will roughen up the surface of the rollers enough to allow them to bite on the grains and pull them through.
The next thing is to construct a hopper to feed the grains into the rollers. I’ve seen some examples online of fancy woodworking or metalworking skills being used to construct hoppers for the pasta grain mill, but again I opted for the path of least resistance – cardboard and duct tape!
And that’s pretty much it. The only other addition was a flat piece of cardboard to direct the crushed grains into a collection container. Here she is in action:
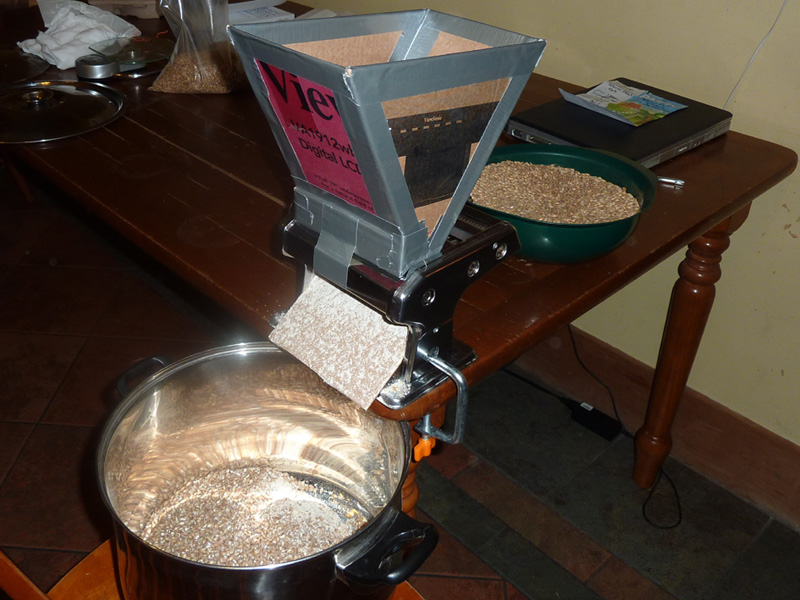
It can be powered with the hand crank that came with it, or by an electric drill.
I milled a few kilos of grain for my latest brew this weekend and I was pretty pleased with the results. I think I got a pretty good crush. The operation started off well but did start to go a bit slow after awhile. I came to the conclusion that my rollers were not quite rough enough so I wasn’t getting a strong bite on the grains and they were coming through quite slowly. I gave up on using the drill after awhile and went back to the hand crank as I found I was just spinning my wheels with the drill bit when I wasn’t getting enough traction and the slower speed of the hand crank was more effective. I got through all the grain that I needed for the recipe but planned on doing some further roughening on the rollers at another time. Here’s an example of the crush: Continue reading
Apr 16 2012
Getting ready to do All Grain on the cheap
I’ll admit it, I’m a frugal home brewer. One of the original attractions to home-brewing for me was the cost savings aspect. But I notice a lot of home brewers get carried away by the hobby and spend a small fortune on all sorts of fancy gear. The home brewing experience for these gear obsessed home brewers turns into another avenue for excessive consumerism and materialism. If you worked out the total costs of some of these elaborate setups, I reckon some homebrewer’s beer ends up costing way more than the best craft beer you could buy. That would be a major ‘off-flavour’ for me. The fact that my beer costs a fraction of what I would have to buy it for is a great incentive for me and perhaps even does more for the perceived flavour of my beer than any fancy equipment could.
To date I’ve been brewing with a bare minimum of equipment: mostly just a 12L pot and and the original plastic fermenter + accessories kit that I first purchased to get into the hobby. With this minimum of equipment I’ve been able to make some pretty decent beer using extract and partial mash brewing methods, beer that I really enjoy making and drinking. Continue reading
Mar 30 2012
Digital(ish) IPA
This is based on the recipe for Digital IPA by Yeastie Boys. I’ve converted the recipe to partial mash and made a few little tweaks on account of ingredients on hand. The original all-grain recipe is here: Digital IPA recipe
Mar 06 2012
Brewing Software Review – BrewMate

Hey there, this post is a collaboration post with some other home brewing bloggers to review all the different brewing software applications that we use. Links to the other reviews are at the bottom of this post.
I came across BrewMate when I was looking for a free recipe calculator application. In the past I had played with the BeerSmith free trial version and then settled down on an Excel spreadsheet application called Kit & Extract Beer Designer which served my needs well until I started doing partial mashes. At that point I was considering buying a copy of the popular BeerSmith but first decided to have a look at some of the free brewing software apps available. Two of the apps that I looked at were QBrew and BrewMate. I found that either of those apps would have met my needs but I settled on BrewMate as it had more features, a nicer interface and has been updated more recently. Continue reading
Feb 22 2012
Working my way through a 28kg bucket of malt extract!
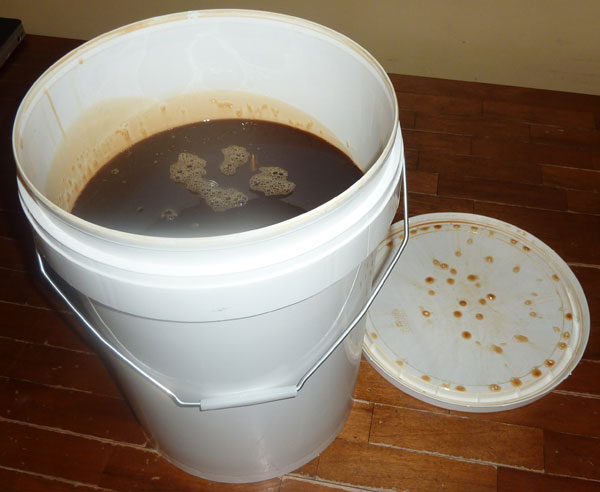 I found a local guy in Nelson that sells home brewing ingredients, Bill Fennell (website – ThatBeerPlace.com). I had a look through is his lists of supplies and the bulk malt extract caught my attention because it cost a fraction of what I usually pay for malt. The only snag was that it came in such large quantities, 28kg of malt extract is a lot of homebrewing! And liquid malt extract needs to be used up while it’s fresh so it’s not ideal to leave it hanging about for many months. Too much malt for me to handle in a short timeframe I thought.
Then some friends of mine decided to get into home brewing after tasting some of my beer. So I figured if we split a bucket between us it would be doable to use it up while it’s still fresh. Four batches each would see it all used up. So we ordered a bucket of Maltexo All Malt Light. I have 2 new batches in the fermentors now so I’m half way through my half. Here’s what I have brewing: Continue reading
Feb 21 2012
Common Room ESB
This is based on a popular ESB recipe on the HomeBrewTalk forum called Common Room ESB which I tweaked it a bit and converted to extract.
Feb 12 2012
Double Cascade APA
This a reprise of my first extract batch, the All Cascade APA, but with double the amount of cascade hops, 200g instead of 100g. It also features double dry hopping, 40g at ferment temp and another 40g at cold crash temp. I got that idea from reading about an Epic Pale Ale clone but I haven’t gone with quite as much hops as the Epic. Still it’s about double the hops that I typically add to a batch so it should be pretty intense.